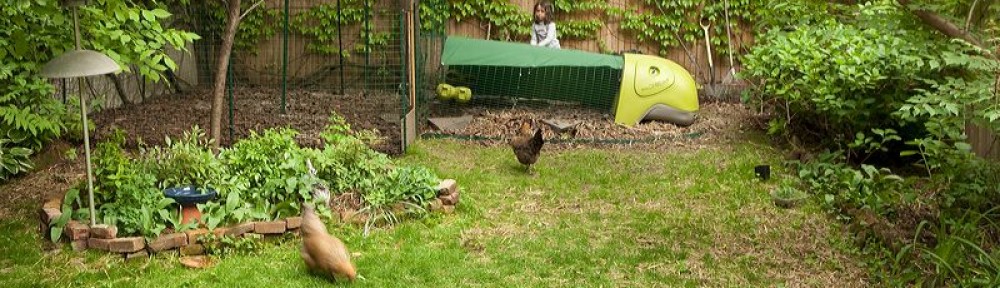
photo by Susan Heller
A lot of people are very interested in composting, but find the process too intimidating. With a few pointers, it’s really very simple. In this lesson I will assume that you have an outdoor space for your compost. We will have a lesson in composting indoors coming up shortly.
How do leaves, berries and other organic matter turn to soil (or compost) in nature? They get rained on and start to decay. What’s the difference between breaking organic matter down at home versus in the wild? Nothing much just some time and energy. If you have a big yard, you can have one or more piles in an out-of-the-way area and let nature slowly break them down. This process could take a year or more depending on what you put on the pile. However, many people don’t have that kind of space or patience.
So let’s assume you have some outdoor space and want a contained pile that will produce rich compost more quickly. There are many online sources to find compost bins. Many cities have compost programs in which they give or sell (at reduced prices) compost bins. This is mutually beneficial because while you get a free or inexpensive compost bin, they don’t have to haul away as much garbage. About 60% of everyone’s garbage consists of organic matter that could be composted. It’s a shame to throw this into a landfill when you could turn it into rich soil for your plants. The New York Sanitation Department has a partnership with the Brooklyn Botanic Garden to subsidize compost bins and classes. This wonderful project is facing the axe of budget cuts unfortunately. The bins are still less expensive than many commercial sites. If you live in the NYC area, you can email them for information about purchasing their bins at compost@bbg.org.
Some online sources for compost bins:
www.composters.com
www.compost-bin.org
www.gardeners.com
Or, you could build your own:
- Take a galvanized trash can and punch holes in it. This compost bin is the best solution if you are at all worried about attracting rodents.
- Or follow the directions on this website, which shows several different types to build.
The most important thing to remember in the beginning is that the organic material you toss in your compost bin will eventually turn into compost no matter what. Short of shellacking your leaves, there’s really nothing to prevent them from breaking down into soil, so don’t worry about messing up the process. They are going to decay and break down without you, so you don’t need to dig into the nitty gritty too much to compost. If you are type-A like myself, you will want to know about the bacteria and fungi that are involved with the process, but let’s keep things simple for now. We want to get you started and help prevent some common problems.
There’s a whole list of things that you can put into your compost pile, but let’s first talk about what should not go in.
DO NOT ADD:
- Meat or Fish – This will stink and attract rodents.
- Dairy
- Oily foods – Oil coats the food preventing the bacteria from getting to the food and doing their good work.
- Pet feces -Dogs, cats and other meat-eating animals carry a host of diseases that won’t break down in a backyard pile. Some cat litter says it’s compostable and it is if there’s only urine in it. But maybe you shouldn’t even go there.
- Inorganic/manmade materials – Rubber bands, metal twist ties, plastic, metal or anything that will last on the planet longer than our grandchildren.
GOOD TO ADD:
The short answer for what to put in is basically everything else and some water. You can certainly make compost with this much information. The stuff that follows just adds a bit of information to make your scraps turn into soil faster and avoid smells. I’m breaking the good stuff into two parts: green and brown.
Add GREEN materials such as:
- Vegetables
- Fruits
- Grass clippings
- Animal manure – From non-meat eating animals such as horses or chickens. Chicken poop is very high in nitrogen, which makes it an excellent choice
- Coffee grounds
- Bread
- Old flowers
- Weeds – Avoid weeds that have gone to seed as they will flourish in your compost and then grow wherever you spread it in your garden.
Add BROWN materials such as:
- Leaves
- Egg shells
- Sawdust
- Tree branches – Avoid ones that are too big as they will clog up your pile for a very long time.
- Unbleached napkins and paper towels
- Newspaper
- Wood ash – Ash from charcoal shouldn’t be used.
- Lint from the dryer or vacuum cleaner bag
Green materials have a lot of nitrogen in them, which helps them decay faster, but can smell in the process. Brown materials have a lot of carbon in them and take longer to decay, but don’t smell. Try to mix some green materials with some brown materials to give you the best of both worlds. You generally want slightly more browns (60%) than greens (40%), but don’t lose sleep over the ideal proportions. If your compost bin is smelly, add some more material from the brown list.
After you’ve added your kitchen and yard scraps you should add some water and mix everything up. You can use a pitchfork or a more specialized comport crank. I use a compost crank that looks like a giant corkscrew. The ideal wetness of a pile is often described as being as wet as a wrung out sponge. You can decide how often you want to add water and turn the pile. The more often you do, the faster the process will be. But if you go away on vacation, you don’t need to find a compost sitter. The pile will continue to decompose on its own. There are products on the market that claim that they will speed up the process so much, you will have finished compost in 14 days. That’s a bunch of snake oil as far as I’m concerned.
Well, that’s pretty much it. You should have beautiful rich garden soil in about 3-6 months. You will also find plenty of earthworms and other little creepy crawlies. They are big helpers in the process and shouldn’t be seen as pests. When you sprinkle the finished compost on your garden, they will only help to enrich the soil. Have fun with your composting. Spread the word. And bask in the knowledge that you are doing a big part in making your part of the world greener and healthier.