Can I pretend that it’s still summer if I keep harvesting tomatoes from my garden?
I can’t quite put my finger on it, but I have been in a bit of a funk lately. I am distracted and easily overwhelmed, which amounts to my not getting much of anything done. Or done particularly well. But I have been doing some things and then my funk just extends to writing about them.
Here are a few things I’ve been doing in my long absence.


This huge bag is filled with basil. The temperatures were dipping down into the low 50s and 40s were on their way, so we pulled it all out and made lots of pesto. I just blend the basil with some toasted pine nuts, olive oil and garlic. This year I “cooked” the cloves of garlic in the microwave for about 10-15 seconds, which took a bit of the raw bite out of them. I freeze the pesto to use throughout the winter. Once it is thawed, I mix grated parmesan cheese into it.

 Have you heard of New Zealand Spinach? My grandmother used to grow it in her garden. Her house was the only place I’ve ever eaten it. It is similar to spinach, but has a bit more substance after cooking. I saw it in a seed catalog and decided to grow it for myself. I just sautéed some garlic in olive oil and then added it at the end and cooked it until it was just wilted. As a kid I used to think my grandma’s NZ Spinach made my teeth pucker, but I didn’t have that experience eating this batch.
 And then there were more volunteer tomatoes. These came from the grape tomatoes that we put in our daughter’s lunches (and sometimes end up in the compost bin). I oven dried them at 220F for about 1 1/2 hours with a bit of sea salt. And I don’t have a photo of the finished product because we snarfed them down too quickly!

 Today I was dealt a crushing blow to my apple harvest. I had noticed that squirrels were slowly stripping my puny dwarf apple trees of apples, but today they totally cleaned one tree off. What’s so maddening is that they pick the fruit, take a few bites, and then leave it on the ground ruined. I feel like they are flipping their little furry finger at me when they do this.
 I was able to find 2 apples that didn’t have rodent teeth marks in them. Hopefully they are ripe enough that I can taste them. I don’t know what to put around my second tree to prevent this from happening. Thoughts?
I think that this post should be called The Lazy Gardener Gets the Kale.
 So for some unknown reason, I didn’t harvest my kale last fall. Don’t ask me why because I don’t have a valid reason. Or any reason for that matter. So I guess the glaring answer is laziness…
Anyhow, we had such a mild winter that the kale survived. I didn’t even have to cover it. Again with the laziness. Sheesh!
I’ve been planting away this spring and decided to finally pull up the spindly looking kale and actually eat it. It’s Tuscan kale, or lacinato kale, which is very tender. And just to keep the whole lazy streak going, I did the simplest (and very delicious) preparation, which is to sauté it in olive oil with garlic. It was worth the wait!


If a reader hadn’t asked, I might have forgotten to post about my little apple tree. In the early spring I posted about trying to pollinate my Sundance apple tree. I pruned branches from another tree and put the branches near my flowering tree in the hopes that the bees would do the cross-pollinating. You can read about the process here. The good news is that it worked and I had 5 apples growing on my tree. I don’t have any experience with dwarf apple trees, so I don’t know if this is a decent number for the first year of fruit. I also wasn’t familiar with this variety of apple, so wasn’t sure how it would look when the fruit was ripe. This apple is one of the 5 from my tree. The fruit is sweet and crisp and delicious. I’ve always dreamed of having a small home orchard, and although 5 apples is a laughably small amount, it is a beginning.

This week was the first week of our CSA or farm share. CSA stands for Community Supported Agriculture. It’s also known as subscription farming.
In the winter, you buy a share of a farm and in return, you get a share of the produce. What’s great for the farmer, is that the payments come all at once (and are predictable), so they can purchase equipment, seeds and supplies for the next growing season. You and the farmer share the risk of a bad year, or the bounty of an excellent growing year.
What I like is that you get to relearn how to eat with the seasons. The beginning of the season has lots of greens. We got lettuce, oregano, leeks, sunchokes, and lots and lots of strawberries. I wish I could describe how aromatic and delicious these strawberries are. Everything is picked when it’s ripe because it doesn’t have to travel thousands of miles. Can you remember the insides of strawberries being red instead of white?

If you live in New York and are interested in participating in a CSA (for next season), click here to find one. We kind of got in through the back door with ours. It has a really long waiting list, but they offer a winter share with frozen fruits and veggies. Somehow participating in the winter share got us in and past the people lined up for just the regular summer share. Shh, don’t tell anyone.

While we were up in the Berkshires, we went to visit Gould Farm to see their maple sugar operation. My in-laws recently met a man named Steve who oversees the maple sugaring there. Gould farm is a pretty amazing place. It is a residential, therapeutic community dedicated to helping adults with mental illness. You can read more about them here.
The evaporator that we saw is powered by a wood fire. From the enormous woodpile behind the sugar shack, it was clear that a lot of wood is needed for the process.
The sap is poured into the far end of the evaporator and works its way through channels. What you can’t see, is that the underside of these channels are shaped a bit like an accordion, so a very large surface area gets heated by the fire. The tree sap ranges from about 2% to 5% sugar and when it’s finished it’s about 67% sugar. We were treated to maple tea, which is the sap that has cooked for quite a bit, but is still in the back half of the evaporator. It is sweet, but still thin like tea. As an extra treat, Steve brought fresh cream from their cows to add to it, which made it taste like ice cream.
There are various ways to know when the maple syrup is finished. You can use a hydrometer, a candy thermometer (it’s ready at about 7 degrees F above the temp of boiling water), or you can do a visual check. The syrup sheets off the ladle in a manner similar to making jam. It is something you can do at home, but we were warned that with the amount of steam that is produced, many homes have lost their wallpaper during the process.
The final syrup was temporarily put in large containers, to be bottled and ready for sale in a couple of weeks. We are definitely going back to get a bottle!


When you are interested in foraging, you really have to pay attention to the seasons. If you read about ramps in the winter, you are going to have to wait until spring to find them. Shopping at grocery stores seems to have made us forget that certain things grow at certain times of year. At least locally, that is. I had read about making acorn flour a while ago, but it wasn’t acorn season. I forgot all about it until I saw Stephanie mention it in her blog. I was going up to the Berkshires for the weekend and it was the right time of year for acorns.
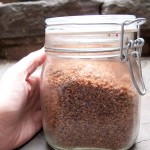
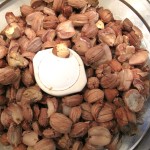
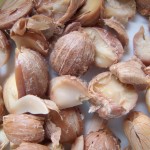
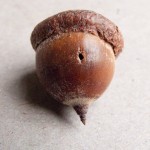
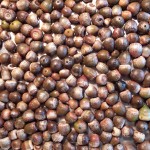
We went on a hike and I brought a backpack along to gather nuts. I had no idea how many I would need, so I summoned my inner squirrel and kept gathering and filling my bag. When we got home, I weighed the nuts I had found and had 8lbs. After pulling off the tops and discarding the ones that had worm holes in them I had 6lbs. I read in a couple of places that you place the acorns in water and the ones that float aren’t viable. I tried that and almost all of mine floated. I decided to check inside and see what they looked like. Some were bad, but most were good, so I decided to skip that theory.
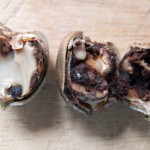
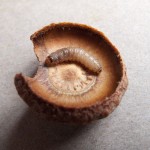
Now comes the gross part…grubs! Many of the acorns had grubs. The fat, white, wiggly things totally grossed me out, so I decided to bake the acorns at 170 degrees F to kill them. A dead grub is still gross, but a wiggling one is much worse.
After discarding the acorns that were discolored or had grubs in them I think I was down to about 2-3 lbs. Acorns are full of tannins, so you have to soak them for several days to remove the bitterness. I tried soaking them when they were chopped, but thought that the water wasn’t getting to the inside of the acorn meat. I ran them through a meat grinder to chop them smaller.
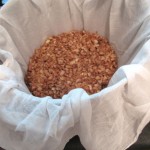
Directions for how to make acorn flour:
I will post some recipes within the next few days.

One of the signs that summer is ending and fall has taken over, is when we have to cut down our basil. Neil always makes a huge batch of pesto that we freeze and enjoy all winter. On Sunday, we had friends over and made a batch of pesto pasta, from some of the last of the pesto. I also harvested the first greens in my garden for a salad. I planted the mache lettuce in the fall and covered the planters with a plastic tarp. There they sat all winter under snow and in the cold. It is amazing to me that anything could grow at all. But grow they did and the salad was delicious. I adore mache greens and have taken to growing them because they are so difficult to find in the store. I have found them at Trader Joes in my neighborhood.

Mache salad with pear and walnuts
Toast about 1/3 c. walnuts. Peel and thinly slice a bosc pear. Thinly slice a shallot. Use a vegetable peeler and shave about 1/3c. parmesan cheese. Add everything to the salad.
Dressing: Mix 1T dijon mustard with 2T sherry vinegar and 1/4c. olive oil. I put them into an empty jam jar and shake it until it emulsifies.
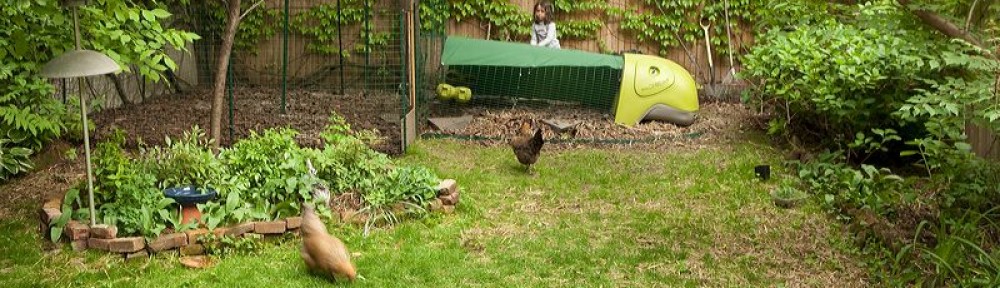
Just a couple of weeks ago I was commenting on how unseasonably warm it was. Since then we’ve gotten colder with most nights below freezing and the ground feels hard under my feet. Neil wrapped the chicken’s run with plastic to protect them from the cold wind and they are spending a lot of time in their little hoop house instead of the larger (un-wrapped) enclosure.
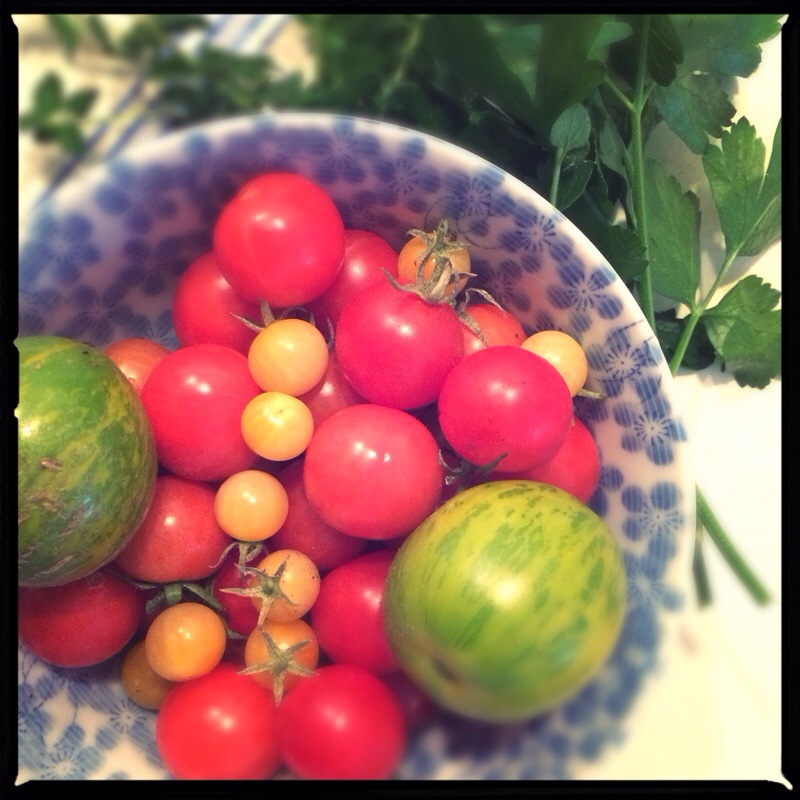
I had many green cherry tomatoes left on the vine, which I didn’t want to go to waste. I did some searching online and found a few pickle recipes. I decided to make a recipe that didn’t use water-bath canning techniques, which just means that I need to eat them up sooner.


Adapted from John Kessler’s Pickled Green Cherry Tomatoes (or tomolives)
1 quart green cherry tomatoes or quartered large green tomatoes
1/2 bunch of dill (about 6-8 stems)
1/2 c. apple cider vinegar
2 t salt
1 t freshly cracked pepper
5 large cloves of garlic, peeled and thickly sliced
Optional: 1-2 hot peppers. I chose not to put them in because of my daughter, but I think it really would help the flavor.
Pierce the tomatoes all the way through with a skewer and then place in a clean quart-sized Mason jar. Add the dill sprigs and pepper.
Bring 1 1/2 c. water to boil with the remaining ingredients. Pour liquid into the jars and cover the tomatoes. Stir the dill and garlic into the tomatoes. Cover and bring to room temperature. Let the tomatoes absorb the flavor overnight in the fridge.
What I would do differently: The original recipe just said to pierce the tomatoes in the stem end. This made 1/2 of the tomato taste pickled and 1/2 taste like a sour un-ripe tomato. After piercing them all the way through, I let them sit another day. I think the longer they sit, the better. These aren’t “officially” canned, so they will go bad. Don’t let them sit around too long. I also thought they could use a little more flavor, so will experiment with the hot pepper next time. I thought they were interesting and definitely a good use for what would have just gone to waste. There are also recipes for friend green cherry tomatoes (cut in 1/2, dip them in some sort of flour or corn meal and then fry), but it seemed as though the breading just wanted to slip off the smooth tomato skins.
Actually I’m really getting jazzed to learn about canning, pickling and fermenting, so I think I’ll try some different pickling techniques next time.